Quick Index
	Executive summary of pointing commands (some details and problem resolution below)

	from cma: do a tiltmeter run

	% /opt/rt/scripts/rtd server=inyo
	  From then, click on USURP at the bottom right, and type "tilt"
	  on the commandline.

	% /opt/rt/scripts/sac --imr corba	  <-- run sac
	>>> from stars import *
	>>> o=[1,3,4,5,6]                         <-- OVRO antennae list
	>>> b=[8,9]                               <-- BIMA antennae list
	>>> ants=w+l                              <-- set your list of ants
	>>> point1('ABOO',ants)                   <-- a test on 1 source with a set of ants
	>>> stars()           ; point(ants)	  <-- 3 sweeps, of which the middle one backwards
	>>> stars(sort='-az') ; point(ants)
	>>> stars()           ; point(ants)
	>>> s.stow(0)				  <-- stow, or do something else
	>>> quit
	% ~teuben/bin/runpoint    	          <-- analyse optical.ovro.data for current day
CARMA optical pointing
You may want to widen your browser, to hold 3 pictures on a side.
Here are two pictures: Alpha Bootes on Antenna 4 on the left,
and the moon on Antenna 2 on the right. Obviously taken
without all of the pointing corrections yet. We shall get to
that below.
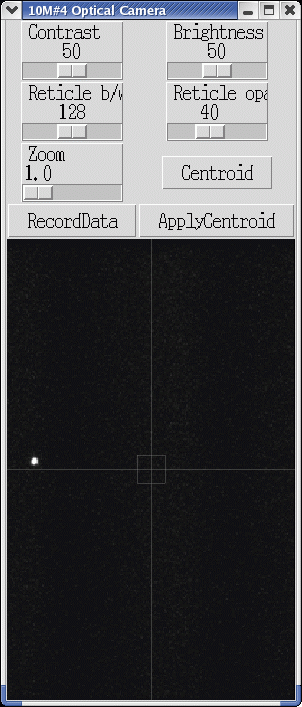
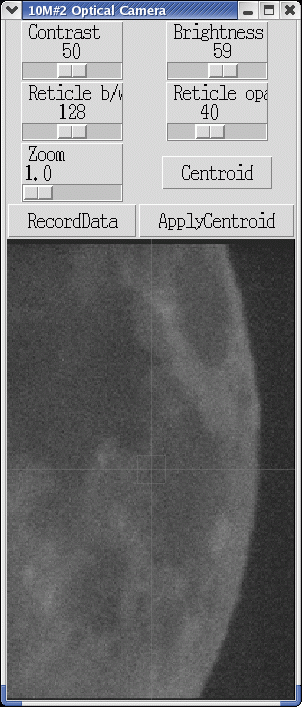
As an example of all(?) the things that can go wrong,
then came saturday.
Cam2 (left) is now flat (after the rebuild, was noisy
like Cam4 before, and sometimes came back to live after a little while),
Cam4 (middle) has been noise for a while
and Cam6 (right)
seemed to have gone out of focus (and loose a lot of sensitivity)?
The source is ALYR, a pretty bright +0.03 mag star
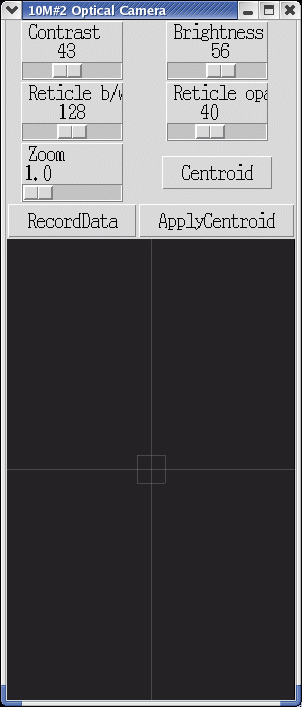
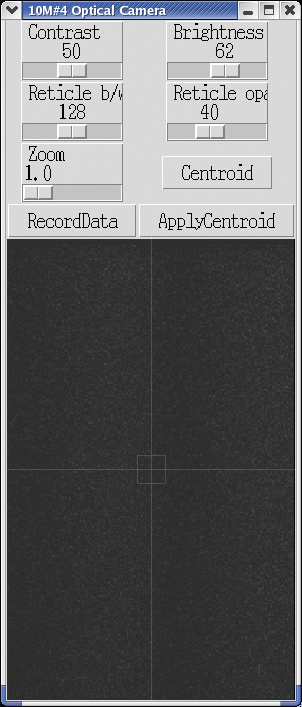
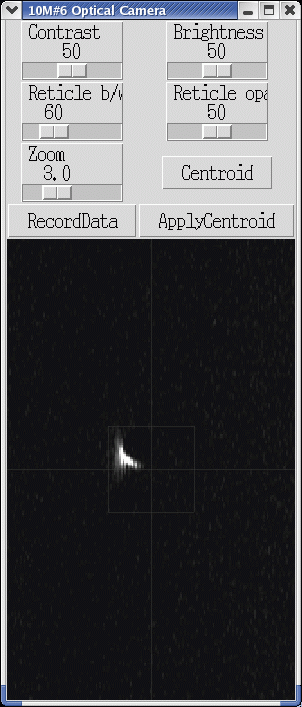
So, the problems we had here were the following:
Ant2 had communication problems,
Ant4 showed a STUCK_CLOSING lenscap
(but apparently not letting any light through).
ant6 also has
a STUCK_CLOSING lenscap, but letting a bit of light by, explaining
the odd shape of stars. Stuck lenscaps require a personal visit
to the telescope to get it unstuck (Jonathan Swift can tell you
all about that). The rtd tool that browses various monitor
point says a lot. OVRO Lenscaps are under :
(Morph or NewWin) -> Antennas -> 10m -> sidecab
Some optical pointing commands
This stuff is still running in python, as being developed. Changes
can be daily....
% /opt/rt/scripts/sac --imr corba.carma.pvt
>>> from stars import *
>>> help(stars)
>>> stars(elmin=10,magmax=1.5)

	this will display a list of perhaps as much 40 stars,
	sorted in azimuth, that are above "elmin" and brighter than
	"magmax".
	During daytime you probably want to use magmax=....  (what's a goodvalue?)
	During nightime no selection is needed
	The table contains:
		Ordinal, StarName, Az (0=north), El, Mag
	normally sorted by Az, but the sort= keyword can change that

        1 ACYG 42.6387458342 13.5766990528 1.25
        2 ALYR 61.7357057522 29.5581585041 0.03
        3 ASCO 137.433624231 12.2158288333 1.09
        4 ABOO 141.800577614 68.0643633995 -0.04
        5 AVIR 177.969067652 41.5238263639 1.04
        6 ALEO 252.027270634 40.5407710147 1.35
        7 BGEM 289.602408689 21.4555191454 1.15


>>> list()
	this will again display the list. If the argument is a valid
        number, it will display just that star (0=all).

>>> cut(2)
	removes the 2nd star  from the list, then if you like the list, go ahead
	and point to them in order

>>> reorder([3,1,2])
        this would reorder the pointing list to start with 3 first, then 1,
        and finally 2. Also a nice way to repeat a star. The new list can
        be as long and as short as you select.

>>> add('jupiter')
	if you want to add a planet (or any optical source really) to the input
        star list. You will have to run stars() again to get the selected
	list for pointing.

>>> point([4,6])
	this will now visit all stars in the list() and use them for
	optical pointing. you'll have to hit the right buttons in the GUI
	of course, but that is another story. The argument is a list
        of antennae to use.

>>> point1('acma',[4])
	if you just want to select a given star to use, for example,
        sirius (ACMA). The optional argument is a list of antennae,
  	as in point().

>>> distance('sun','moon')
	another tool is the distance between two sources (phase of the moon etc).e,g.
	which returns the angular distance between two objects

>>> show('acma')
	and just to get a bit of ephemeris data (ra,dec,az,el etc.) For stars you'll
	get to see the magnitude as well.


>>> Camera(Ovro(6)).on()
	if you just want to view the camera on ant 6. This is not part
	of the 'stars' package, but is of course used.

GOTCHAS:
  - once point() has started, there is no way to interrupt the list,
    e.g. to go back to the previous star, or redo the same star again.
    A gui on top of this would solve this, or some query technique
    before going to the next item in the list.
How to operate the Optical Camera GUI
You should now be familiar with how the GUI look on the screen, from the
various screendumps earlier on this page.
  0. If you don't see a star, go to the trouble shooting section below.

  1. change brightness, and perhaps contrast and zoom, to make
     the star apparent. what's apparent to your eye, will be apparent to
     the finding algorithm.

  2. click on Centroid to see how it goes. go back to step 1 and repeat
     until reliable. Important note: do NOT change the sliders while
     the centroid is being computed.
     Note for most night pointing you can skip this step and go straight
     to step 3.

     Either way, you should see something like

        Offset(asec): 90.0 +/- 0.7,  10.1 +/- 0.4

     if the star is bright enough and doesn't movie around too much
     (check the wind, don't do this when the wind is over *XXX* mph)

  3. click on ApplyCentroid, this will hopefully find the same center, and
     in addition apply the just found pointing offsets in Az/El to this
     particular telescope. You can also monitor in rtd the settings
     in Antennas -> 10m -> drives -> pointing.

  4. If you want to keep the data for the pointing data reduction software,
     now record this by clicking on RecordData.
     Currently this appends a line like
        ovro4 20Jun05 03:09:06 53541.13132  -38.7060   10.0600 -18.73  -0.34
     to a file /home/control/pointingData.txt


  5. There is QUIT button, click on the X (usually the top right the
     window manager labels the window with) to close the camera and
     proceed with another star/antenna


	(no doubt this procedure and format will change)
oops, i don't see a star...
Apart from the obvious problems like with the lenscaps and the CAN bus,
if you
see sky, but your star doesn't fall inside of the viewing
area (which is 10' x 16' for OVRO and roughly 24' x 30' for BIMA),
you probably have to change the
pointing offsets manually. If the (not too new) moon is up, it's a great big
object of which some piece usually falls inside of the camera view.
But of course you would have to keep a mental picture of the features
on the surface.
If not, below is another amusing example how I quickly noticed the offset
to apply:
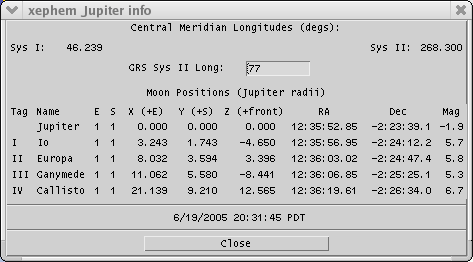
Pictures: Jupiter with offAz=-19' (right), with offAz=-15' (middle),
screendump from
xephem,
north up (right)
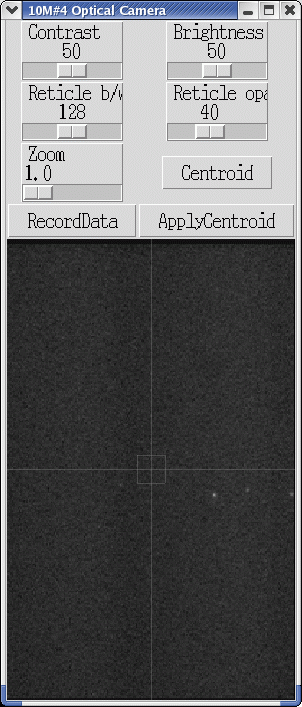
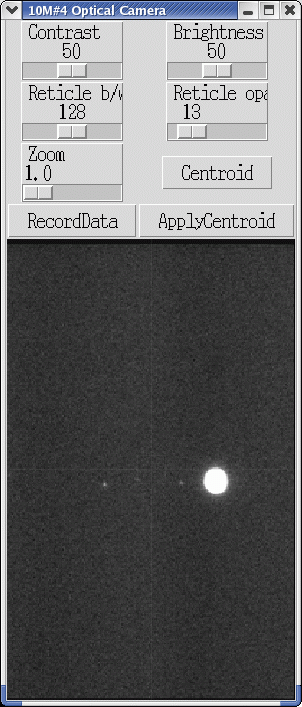
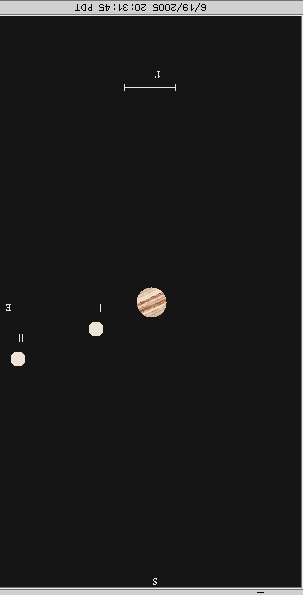
The picture of the left was taken with an offAz of -19' in this case.
The 3 little "stars" are actually moons of Jupiter, so Jupiter is
just to the right (west) of this image. So instead of setting an
offset of -19', lets try -15'. Again in 'sac' (python):
>>> a4 = Ovro(4).drive()          obtain the drive interface to ant4

>>> help(a4)                      if you need a reminder....

>>> a4.setOffset(-15,0)           check with rtd if offAz/offEl changed

>>> Camera(Ovro(4)).on()          and watch the new view with Jupiter included
                                  now proceed with step 1 above
Random Notes
- the moon is a great object to get an idea of the orientation
of the camera. Another object might be ZUMA, which is a double star
with a separation of about 1-2' ?
The Manual Procedure
With enough of a taste of what could go wrong, here's the recipe
on how to do manual optical pointing (with mostly
cut and pastable commands):
Shell sac-1
  # first start rtd, since it will be good to monitor pointing, tracking and such:

   /opt/rt/scripts/rtd &

	(if you get a username asked, just type in 'obs')

  	Now bring up two windows:
	window 1: click  Morph -> Antennas -> 10m -> drives
	and a 2nd one,
	window 2: click  NewWin -> Antennas -> 10m -> sidecab

   # it is probably handy to have two shells around, in each you start sac
   # (the interactive python script,  abbreviated from SubArrayController):

    /opt/rt/scripts/sac --imr corba.carma.pvt
    ...   (ignore the warnings)
    >>>

   # in the first sac-shell one you will change the Az/El drive offsets
   # in case you cannot find the object and need to step
   # around a bit. From the second sac-shell we will launch pointing, as
   # exemplified below.
   # In the first sac-shell, make drive objects for the antenna you're interested
   # in, e.g.


    d2 = Ovro(2).drive()
    d4 = Ovro(4).drive()
    d6 = Ovro(6).drive()


   # For example, if you now look at the "Carma OVRO Antenna Drives Status" rtd window
   # click on the 'pointing' tab and look at the offAz and offEl rows

   # to change an offset, e.g. Ant2 set the offAz=0.5 and offEl=-0.5 , do


    d2.setOffset(0.5,-0.5)


   # If the old offset was (0,0) this would have moved the camera to the right
   # and a bit down. Meaning if a star was in the middle, now it would be
   # up to the left in the image...


   # Another way of saying: suppose you see the star in the very right of the
   # image, too close to the edge to be useful, and suppose you see offAz=-19
   # then try setting it to -14, it should move it pretty much to the center.


   # Find two stars, via the stars() command, at widely separated elevations
   # Use the setOffset() command to move around and find the star, then
   # applyCentroid and make a note of the Azimuth offset that was recorded
   # for this Elevation.  Repeat this for the other star. Then run the command
   #              m1(El1,dAz1, El2, dAz2)
   # which returns the offset and slope (called m1 in the pointing model)
   # then do (asssuming we're working on Ovro(2))
   # 	          d2.setMountPointingConstants(m1,m2,m3,m4,m)
   # where m1 is the more important Az offset that needs to be corrected.
   # you can keep m2..m5  the same as they were before
   # The command
   #              showm()
   # is a convenient function to show all the m's for all the ant's.
Shell sac-2
   # In the second shell, also start up sac:

    /opt/rt/scripts/sac --imr corba.carma.pvt
    ...   (ignore the warnings)
    >>> from stars import *

    # now make a selection of the stars you want to use
    # they should come out with starting at AZ=270 going up to 0, and
    # then from 0 to 270 again, for optimized slewing.
    >>>  stars(elmin=10,magmax=1)

    # if you don't like this selection, use the cut() and/or reorder()
    # commands as explained before.
    # Once ready to go, start the big loop:

    >>>  point(ants=[2,4,6])

    # this will now slew to the first source in the list, and visit the
    # antennae as specified in the ants[] list. For each star the well
    # familiar Optical Camera GUI will show up, and the aim is to
    # center the star (often several ApplyCentroid's are needed) and
    # record it in the database using RecordData.
    # There is nothing magical about point(), the only thing it does
    # is run the commands
                    s.track('ABCD')
                    Camera(Ovro(2)).on()
                    Camera(Ovro(4)).on()
                    Camera(Ovro(6)).on()
    # in a big loop, looping over all visible stars is an optimized order,
    # so you can also issue these commands manually, or use the point1()
    # command to just do 1.

     NOTE:: while ApplyCentroid is working, do not touch other buttons/sliders in the GUI !!

    >>>
    >>>
The Automated Procedure
New in development, this will automatically generate fitted positions. The procedure
is essentially:
   scripts/sac --imr corba                        <-- start SAC
   >>> stars()                                    <-- generate a list of stars "up" and "bright"
   >>> point()                                    <-- point
It will also generate fits files for all the stars (16 co-added images) that could be inspected.
They live in the stars- subdirectory, and have names such as ACMA-ovro1.fits.
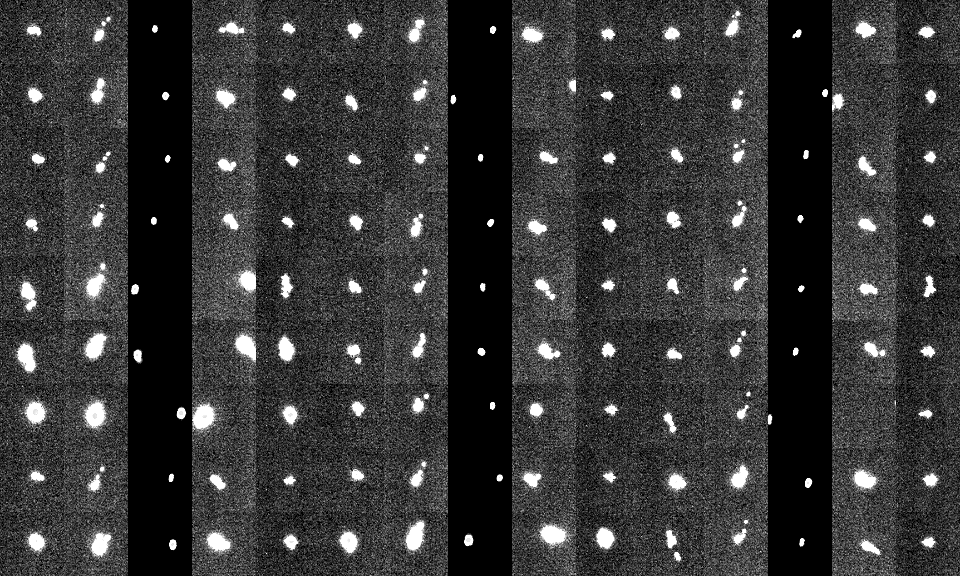
Mosaic of 27 star fields (inner 64x64 pixels) over antennae 1,2,3,4 and 6 on the 2nd July 1 run.
Each row contains 3 stars, antenna 3 has a different background level, which explains the
vertical bands.
Shell POINT
The original OVRO (vax based) pointing program point has been ported to linux
and should be used to compute the pointing coefficients. The automated procedure
now also writes a file optical.data in the directory from which sac was started.
This file can be passed directly into the POINT program.
Errors
1) sac complains about
     sh: line 1: checksource: command not found

     Solution:   quit from sax, add /opt/rt/bin to your shell path, eg.
	set path=(/opt/rt/bin $path) ; rehash
	and restart sac.
Data Files
The pointing procedures produce the following files (note some depend
on your $cwd (current working directory):
- ~control/pointingData.txt : for all dishes. Example:
 bima2 02Sep05 09:29:00 53615.39513  294.2333   77.0336 1689.96 3336.42
 bima3 02Sep05 09:29:33 53615.39552  264.1873   22.0129  23.82 -44.13
 ovro1 02Sep05 09:29:44 53615.39565  263.7880   22.7300  -0.05  -0.11
 ovro2 02Sep05 09:29:55 53615.39578  263.8200   22.7000   0.12  -0.00
 ovro3 02Sep05 09:30:06 53615.39591  263.7550   22.6600  -5.14  -0.35
 ovro4 02Sep05 09:30:17 53615.39604  263.9040   22.6200   1.41  -0.33
 ovro5 02Sep05 09:30:29 53615.39616  263.8740   22.5900  -1.88  -0.01
 ovro6 02Sep05 09:30:40 53615.39629  263.9190   22.5500  -1.00  -0.04
- $cwd/optical.ovro.data : only for OVRO dishes for now, since
only the (ovro) POINT program can reduce them. Example:
MM1 OPT AAQL         02Sep05 53615.39565  263.79   22.73  -0.05 0.00  -0.11 0.00
          001   -9.437   0.000  -0.697  -0.012  -0.069   1.670   1.968  -0.770
MM2 OPT AAQL         02Sep05 53615.39578  263.82   22.70   0.12 0.00  -0.00 0.00
          002   39.853   0.000  -0.330  -0.034  -0.082   2.315  -5.109  -0.694
MM3 OPT AAQL         02Sep05 53615.39591  263.75   22.66  -5.14 0.00  -0.35 0.00
          003   10.187   0.000  -1.794  -0.061  -0.023   2.990  -0.793  -0.439
MM4 OPT AAQL         02Sep05 53615.39604  263.90   22.62   1.41 0.00  -0.33 0.00
          004   -0.848   0.000  -0.631  -0.004  -0.040   5.564   2.091  -0.405
MM5 OPT AAQL         02Sep05 53615.39617  263.87   22.59  -1.88 0.00  -0.01 0.00
          005   12.400   0.000  -0.760  -0.020   0.200  -3.340  -0.400  -0.560
MM6 OPT AAQL         02Sep05 53615.39629  263.92   22.55  -1.00 0.00  -0.04 0.00
          006   20.879   0.000  -0.357  -0.033  -0.051  -2.494   2.800  -0.440

ant mode star        ddMmmyy mjd          Az       El     dAz  dAzerr dEl dElerr
          ant    m1      m2      m3      m4      m5      o1      o2      o3
- $cwd/optical.bima.data : only for BIMA dishes for now, since
only the (miriad) PNT program can reduce them. Current example
(the format will slightly change once again):
  -19.701   130.374   112.061  1699.082  3427.843     0.000  2 BAND
  -19.700    79.824    56.225     5.552     0.683     0.000  3 BAND
  -19.699   126.052    98.683  1720.377  3482.145     0.000  2 AARI
  -19.699    89.526    40.432     3.829     1.049     0.000  3 AARI
  -19.698   176.930   124.375  1742.123  3536.712     0.000  2 AAND
  -19.697   103.446    66.990     6.803     0.337     0.000  3 AAND
  -19.696   230.035   124.803  1765.072  3591.339     0.000  2 APEG
  -19.696   157.146    66.449     6.377    -0.037     0.000  3 APEG

     UT       Az        El       dAz        dEl        tau  Ant Star

(format before 3-sep, added a ddmmmyy in the first column after sep 3)
- $cwd/stars-YYYY-MM-DD/ : a directory with fits files
that contain the accumulated (16 normally) images from a star on a dish.
The filename has the format $source-$dish.fits. Note that you
can make test images via a command such as Camera(Bima(2)).on(object='test1'),
in which case you will find a file test1-bima2.fits in that directory.
Use ds9 to view the fits images.
Running the OVRO POINT program
The OVRO POINT program has been translated to linux and made to work.
Here's a small recipe :
/home/teuben/bin/runpoint
PJT 8-sep-2005


