 The projector does 1152x864. Using the NVIDIA utility I set up a second screen
for the projector that was centered on the laptop screen.
The projector does 1152x864. Using the NVIDIA utility I set up a second screen
for the projector that was centered on the laptop screen.
For the remainder of this article, I will refer to the laptop display unit as "LCD" and the external display unit as "CRT". The latter one could be a real monitor, or a projector unit (or "beamer" as our European collegues call them). There is also a mode (called twinview) where you can display two different view on the LCD and on the CRT. Your graphics card and X server will need to know about this in order to work.
If it does not, most laptops have a special button to toggle the CRT "on". Most buttons are actually a 3-toggle, so they can cycle through the 3 modes: CRT alone, LCD alone, and CRT + LCD together, by pressing this button again and again. On my Dell 5000 this button is Fn-F8, and is labeled "CRT/LCD".
Don't panic if your screen goes bonkers when you toggle to CRT (it this does on mine). It probably means your X server cannot sync up, and now has problems syncing back. Normally you will be able to get your old X back (no need to reboot or kill X yet) by switching to another virtual console (VC) and coming back to X:
	ctrl alt F2			switch to VC2
	ctrl alt F7			switch back to X

and if that fails.....

	ctrl alt backspace		a shortcut to kill your X server

and if even that fails.....

	ctrl alt del			reboot the machine
You can simply try it, or look at your /etc/X11/XF86Config (or /etc/X11/XF86Config-4) file which modes have been defined.
Here is the relevant section from mine, you can usually find it at the tail end of /etc/X11/XF86Config-4:
Section "Screen"
	Identifier   "Screen0"
        Device       "ATI Rage Mobility"
        Monitor      "Monitor0"
	DefaultDepth	16

	Subsection "Display"
        	Depth       16
                Modes       "1400x1050" "1024x768"
	EndSubsection
EndSection

Section "Screen"
	Identifier   "Screen1"
        Device       "ATI Rage Mobility"
        Monitor      "Monitor0"
	DefaultDepth	16

	Subsection "Display"
        	Depth       16
                Modes       "1024x768"
	EndSubsection
EndSection
In this example I left out the "1280x1024" mode, since it does not seem to
work on my LCD. The second screen (called Screen1 here) is useful if
you wind up with an external display that cannot handle the high
resolution, and your X display server has the -screen option (see below)
If your CRT will sync up in 1024 mode, you will find the virtual desktop size remains at the maximum mode size, 1400 in this case, and thus you will only get a 1024 scrolling window in this 1400 screen. This is probably not good enough for a full screen presentation, so you will need to consider the next step.
Another added note here, you may also see the following
Section "Device"
    # Uncomment the following line to enable external display
    # Option "crt_screen"                                              <---------
        Identifier   "ATI Rage Mobility"
        Driver       "ati"
        VendorName   "ATI Rage Mobility"
        BoardName     "ATI Rage Mobility"

        #BusID
EndSection
Notice the crt_screenoption. Uncommenting it will also help using the LCD and CRT together.
xrandr
 SZ:    Pixels          Physical       Refresh
*0   1600 x 1200   ( 290mm x 221mm )  *60
 1   1400 x 1050   ( 290mm x 221mm )   59
 2   1280 x 1024   ( 290mm x 221mm )   60
 3   1280 x 960    ( 290mm x 221mm )   60
 4   1024 x 768    ( 290mm x 221mm )   60
 5    800 x 600    ( 290mm x 221mm )   60
 6    640 x 480    ( 290mm x 221mm )   60
 7    700 x 525    ( 290mm x 221mm )   59
 8    640 x 512    ( 290mm x 221mm )   60
 9    512 x 384    ( 290mm x 221mm )   60
 10   400 x 300    ( 290mm x 221mm )   60
 11   320 x 240    ( 290mm x 221mm )   60
Current rotation - normal
Current reflection - none
Rotations possible - normal
Reflections possible - none
and with the command
xrandr -s 4
the screen would switch to 1024x768 and most likely this will fit on
the simpler external display panels. I have some anekdotal evidence
that this may have screwed up my APM slightly, which interfered with
my NVidia driver and could not come properly out of suspend or go into
it.
OLD METHOD:

	Ctrl Alt F2				switch to VC2, as root

	# cp /etc/X11/XF86Config-4_1024 /etc/X11/XF86Config-4

	ctrl alt F3				switch to VC3, as normal user
	##  before you start X, try to toggle CRT/LCD to the CRT also


	% startx -- :1
	## this new X server will appear under VC8
	## now use the CRT/LCD toggle

	Ctrl Alt F7				switch to the :0 (lcd) x server
	Ctrl Alt F8				switch to the :1 (crt/lcd) x server

	## when all done, and :1 will be finished, go back
	Ctrl Alt F2

	# put the original one back in place for normal usage
	# cp /etc/X11/XF86Config-4_1400 /etc/X11/XF86Config-4

	Ctrl Alt F7				switch back to :0
NEW METHOD:
	ctrl alt F3				switch to VC3, as normal user

	##  before you start X, try to toggle CRT/LCD to the CRT also
	##  to see if you can can the LCD to show up the console

	% startx -- :1 -xf86config XF86Config-4_1024

	## this new X server will appear under VC8
	## now use the CRT/LCD toggle

	## or you can do this:, if you have made multiple Screen sections

	% startx -- :1 -screen Screen1
Worth noting: once you are about to start the new low resolution X, try to toggle the display mode into CRT+LCD or CRT, but try and see if the screen usage is the same. On my machine the CRT+LCD mode does not display 100% of the screen, some edges are cut-off. In CRT only mode it does use full screen (using the laptop may not be a little harder).
Also note that the crispyness of colors is often different on CRT and LCD. Certainly overhead display units for presentations loose a lot of color, and what you see as clear on the LCD, will come washed out on the CRT. The gamma factor can also be different.
First, this X server can be used as a generic driver for
   a chipset that does not yet have an Open Source driver
   (note that it will be un-accelerated).  Secondly, this
   X server "speaks" VESA protocols, so it will produce the
   exact timing needed by projection systems.  This feature
   is handy for using your laptop to display a presentation
   on a projection system on the road.  Your regular X server
   may or may not be in sync with the projection system, but
   the FBDev X server will always work.  Thirdly, this X
   server can produce a larger display, at a higher resolution,
   for consoles on laptops.
Thanks to Kevin Cole for noting this.
Problem with showing movies: they become a black square on the screen, and ok
on the laptop. Sometimes the solution is to turn off the display on the laptop
and toggle to projector only, but this user commented to that suggestion as
follows (using WinXP):

The solution turned out to be to use the dual monitor setting in the display
setting.  I have to activate the second monitor and tell power point that i
want to display the talk using the second monitor to the projector.  I
actually inadvertantly found that this way I can have a different screen on
my laptop which allows me to have a set of notes that the audience doesn't
see!  this might have been there all along, but I only found it now.  All in
all, it's a pain, but I've got it figured out now.

On my Inspiron 8200 i cannot use the USB mouse when plugged in. So i switch
to PS/2 with the usb-ps2 adaptor. Can't use the wheel, but o well.

With the native X driver i could not have 2 versions of X running, but that
was solved with the Nvidia driver.
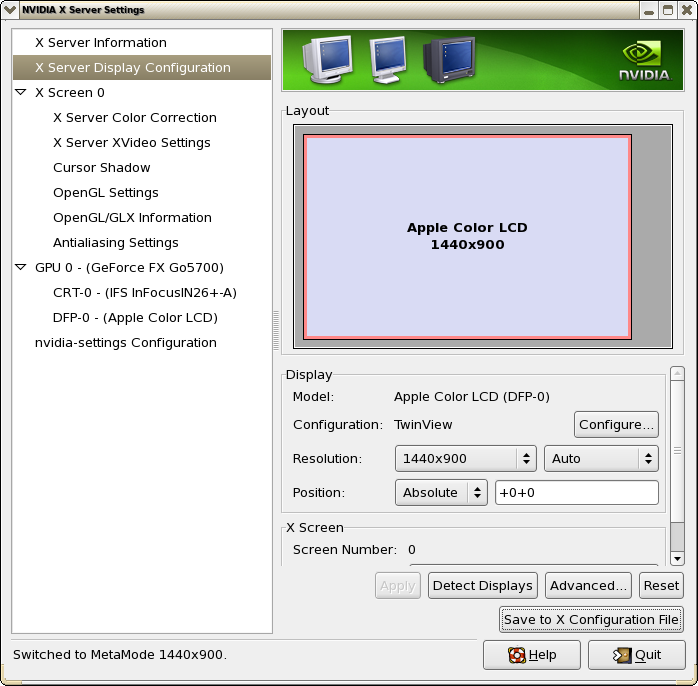
I was able to use the NVIDIA X Server Settings tool to work things out satisfactory. I ran into a special problem that between my XVGA+ laptop screen and the presentation projector, there wasn't a single common screen resolution. The laptop typically does 1440x900 and then nothing until 800x600.
The projector does 1152x864. Using the NVIDIA utility I set up a second screen
for the projector that was centered on the laptop screen.
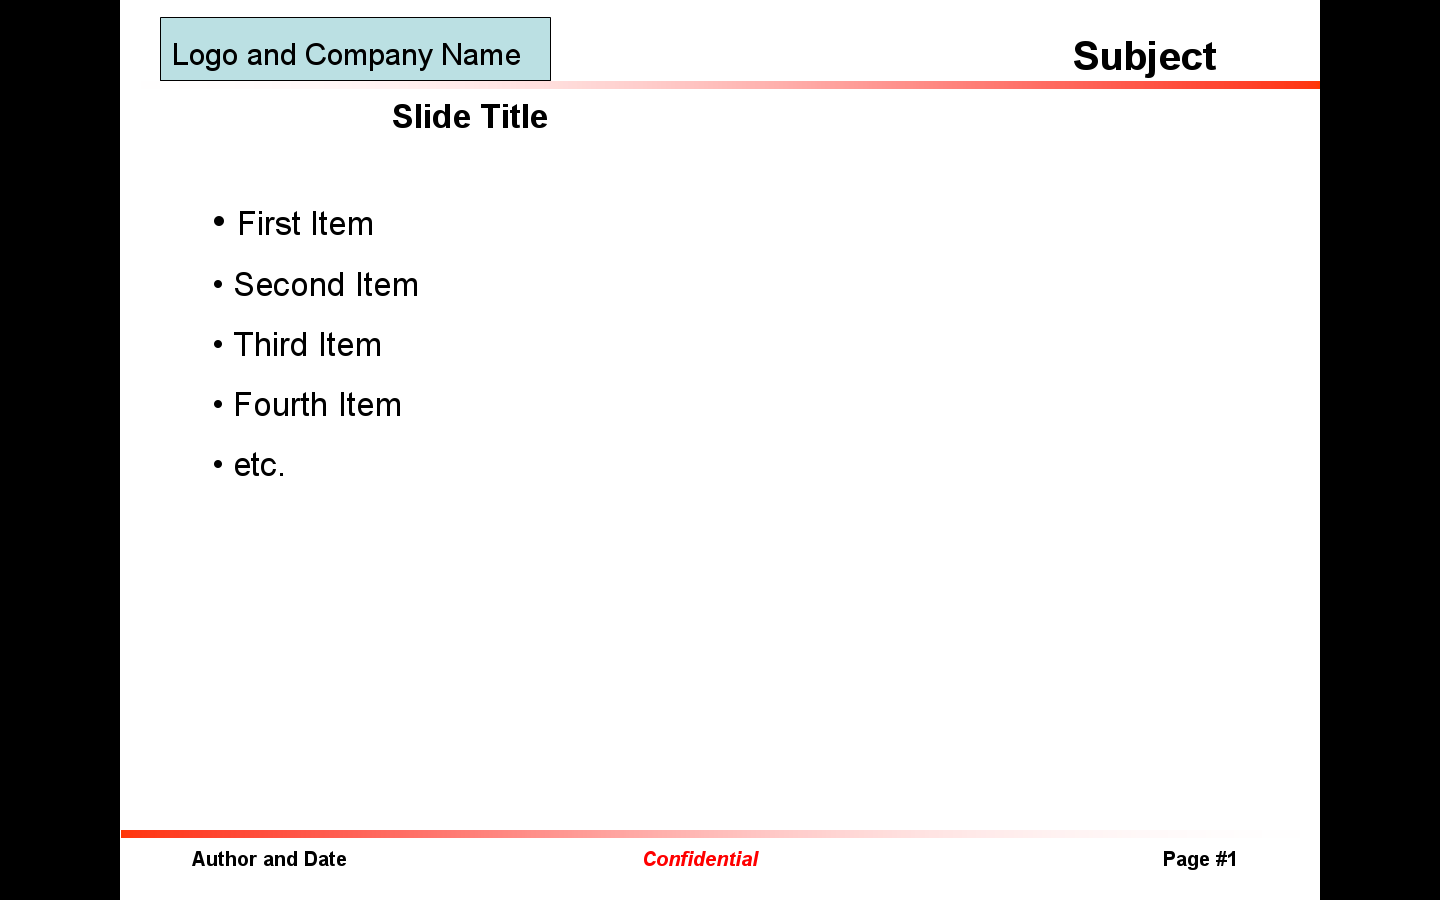
 Selecting the "twinview" mode allows for both to be displayed at the same time.
Because of the difference in size, part of the presentation slide will be cut off.
However, since the (Powerpoint) slides don't make use of the full width of the
wide laptop screen, it is not all that bad.
This is what I see on the laptop:
Selecting the "twinview" mode allows for both to be displayed at the same time.
Because of the difference in size, part of the presentation slide will be cut off.
However, since the (Powerpoint) slides don't make use of the full width of the
wide laptop screen, it is not all that bad.
This is what I see on the laptop:
 and this is what the audience sees through the projector:
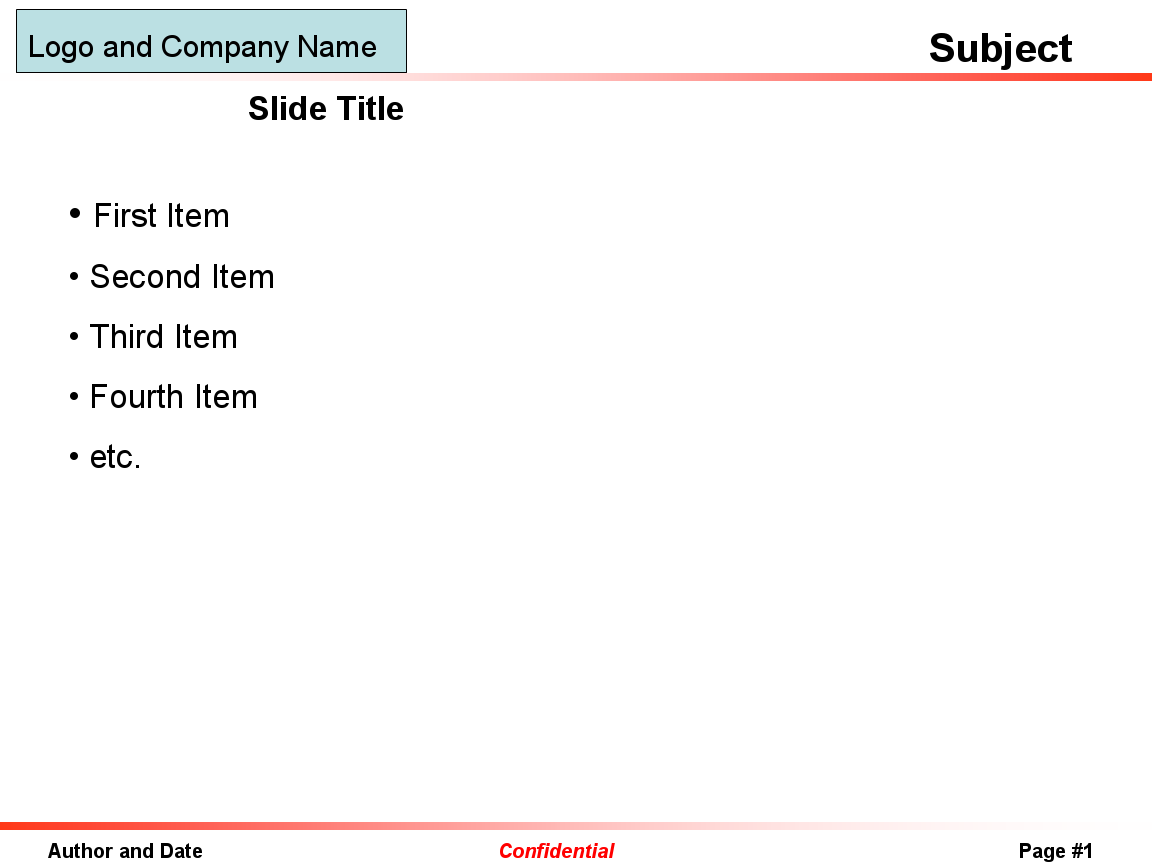 which includes all the pertinent information on the slide. Basically one looses
18 pixels from the top and bottom,
because of the difference in vertical resolution (900 vs 864) and 24 pixels from
the left and right, because of the
difference in horizontal resolution (effectively 1200 vs 1152).
which includes all the pertinent information on the slide. Basically one looses
18 pixels from the top and bottom,
because of the difference in vertical resolution (900 vs 864) and 24 pixels from
the left and right, because of the
difference in horizontal resolution (effectively 1200 vs 1152).
You need to run the NVIDIA utility as root only if you want to save things to the /etc/X11/xorg.conf file. For setting things up for a single presentation, no superuser permissions are necessary. Boot up or refresh the X server /*without*/ the projector cable connected or else the projector will "steal" the screen and nothing appears on the laptop. After login, start the NVIDIA utility (on my Redhat ES 5 system, this is found at "System->NVIDIA X Server Settings"). Select the "X Server Display Configuration". With the projector connected and powered-up, click "Detect Displays". Highlight the projector screen and click configure. In the "Configure Display Device" select "Twinview". In the main window set the "Resolution" to the maximum (1152x864 in my case) and set "Position" to "Absolute". Then either type in the relative screen position or drag the screen image to the desired location. Hit "Apply" and that should do the trick.
teuben@astro.umd.edu (last modified: 04-Apr-2008 09:08 )